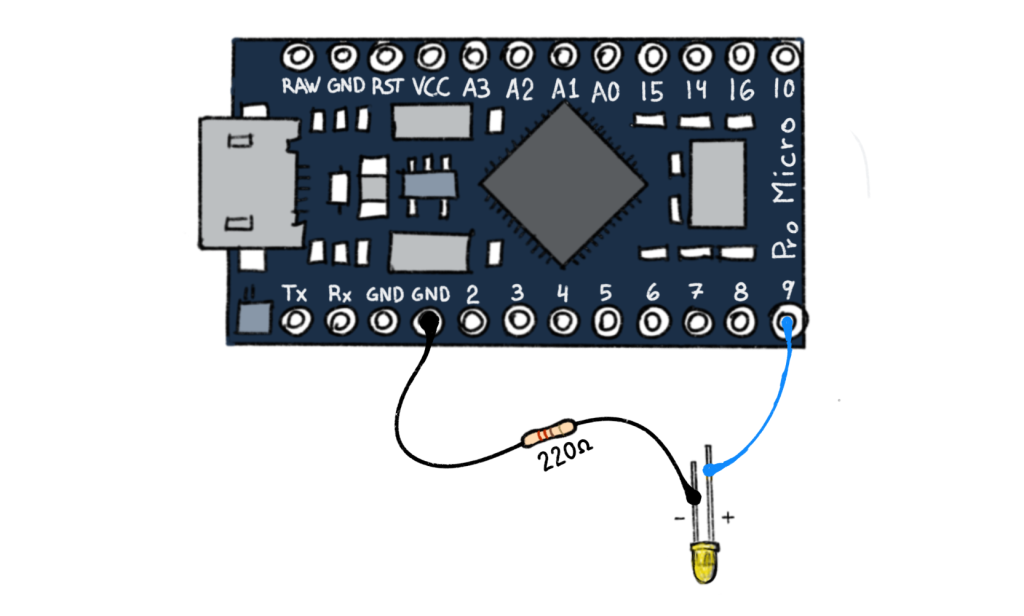
Connect the Anode (+) or longer leg of the LED to one of your digital output pins — in this case Pin 9. Connect the shorter, or cathode, leg to ground through a 220Ω resistor (red red brown gold).
If you play the MIDI note associated with pin 9, the pin is turned on, or set to HIGH, and will send 3.3v through the LED and the resistor, completing the circuit to ground. Your LED should turn on! Let’s look at the code…
// Create an array of NoteLED objects that receive midi note events from the computer to send 3.3 volts to a pin on the arduino

NoteLED leds[]{
{9, 70}, // pin 9: LED output (midi note Bb4 or 70)
};
Create a NoteLED object and set up an array, leds[]. The array lets you easily add more leds if you want. Next specify the pin (9) and the MIDI note that the pin responds to, note Bb4 (or midi note 70). So, what if you wanted to add 2 more LEDs? You code would look like this…
// Create an array of NoteLED objects that receive midi note events from the computer to send 3.3 volts to a pin on the arduino

NoteLED leds[]{
{9, 70}, // pin 9: LED output (midi note 70)
{8, 69}, // pin 8: LED output (midi note 69)
{7, 68}, // pin 7: LED output (midi note 68)
};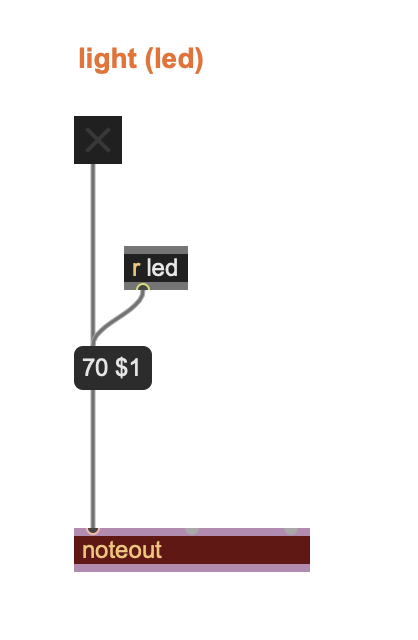
If you are using Max, sending a midi note to NoteLED might look strange at first. We are actually sending a 2 item list to the [noteout] object. When you turn the toggle on it sends a 1, which populates the variable ($1) in the list, sending (70 1) to the noteout object. The 70 is the note number, and the 1 is to turn the note ON. When you turn the toggle off it sends a 0 and the noteout object receives (70 0) with the 0 turning the note (and the LED) OFF.
Expanding Digital Outputs
You can use the same NoteLED code to drive a small vibration motor. Connect one leg of the motor (it really doesn’t matter which leg in this case) to power (red) and the other leg to ground through a 10K resistor. You won’t be able to control the speed of the motor, but you’ll be able to turn it on and off from your computer by sending a MIDI note.
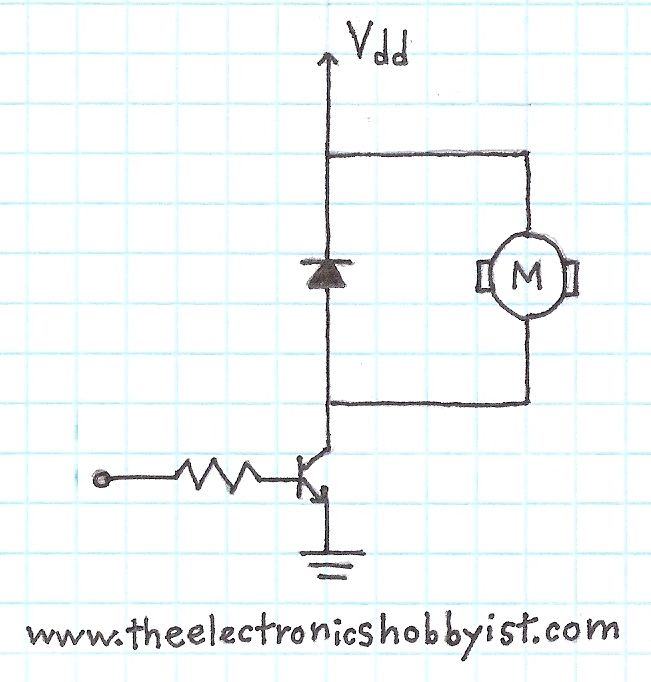
Transistors
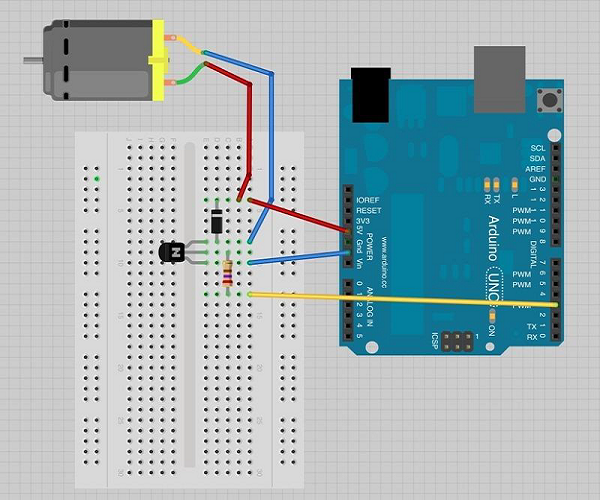
A better way to connect a motor uses a new component called.a transistor. A transistor allows you to control higher power devices using the same 3.3v signal that turns on an LED. This is often used for motors and higher power LEDs.
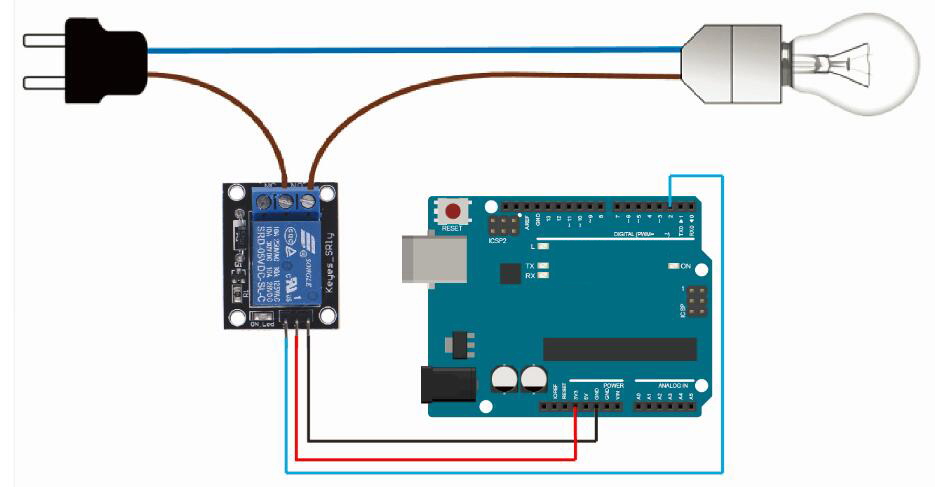
Relays
There is yet another way to expand the functionality of these NoteLED pins. You can connect the digital output pin to a relay. A relay is an electrically operated switch. Relays are used when it is necessary to control a high power circuit using a separate low-power signal (like the output of a microcontroller pin). For more information on relays and arduino, look at this page. (Note: they use a 5v relay, but they make 3.3v relays as well)